Introduction
PyCharm is a popular IDE for the Python programming language, and is developed by Jetbrains.
Remote development means running the back-end of a development environment on a remote device other than the user's personal device.
Remote development using PyCharm is officially supported by Jetbrains.
Prerequisites
It is assumed that:
- The user is already somewhat familiar with the PyCharm IDE
- The user has access to either PyCharm Professional or PyCharm Edu
- The user is comfortable manually editing configuration files
Table of Contents
Add Snellius/Lisa nodes as hosts to the ssh config
Edit your ssh config (typically located at ~/.ssh/config), and add the following snippet.
The following snippets allow you to directly ssh from your computer to an allocated node, which allows PyCharm to run on the allocated node instead of on the login nodes of Snellius/Lisa.
Snellius
Host snellius
  Port 22
  HostName snellius.surf.nl

Host tcn*
  HostName %h
  ProxyJump snellius
Changing node type
Change tcn to the name of the node 'flavour' you actually want to allocate. You can find a list of node flavours here
Lisa
Host lisa
  Port 22
  HostName lisa.surfsara.nl

Host r*n*
  HostName %h
  ProxyJump lisa
All Lisa nodes have the format r*n*, for example: r38n4
Allocate an interactive node
This process is more broadly described here, but it boils down to allocating an interactive node using the salloc command:
salloc command, e.g.:salloc -n 32 -t 4:00:00
To make the process slightly easier, you may want to allocate the same node every time.
This is possible using the -w flag of salloc, e.g.:
salloc -N 1 -t 06:00:00 -w r10n2
SLURM will inform you whether the node allocation has been succesfull:
robertsc@login4:~$ salloc -n 8 -p fat_soil_shared -t 06:00:00 -w r38n4
salloc: Pending job allocation 8485336
salloc: job 8485336 queued and waiting for resources
salloc: job 8485336 has been allocated resources
salloc: Granted job allocation 8485336
salloc: Waiting for resource configuration
salloc: Nodes r38n4 are ready for job
You will be fully charged for the allocated resources, even if you are not actively running any Python scripts through PyCharm
Find the hard links to your project
Some of the directories in Lisa, and most of the directories in Snellius are symbolic links.
As an example, your home directory in Snellius is not actually located at the address /home/<username>/;
if you execute readlink -f /home/username/, you will see an address similar to /gpfs/home5/<username>/.
PyCharm remote development currently does not parse symbolic links correctly; we need to only provide hard links to PyCharm.
Therefore: any time we fill in a file system path while setting up PyCharm, first find its hard link.
For example, if we want to load a project located under the path /home/robertsc/2D-VQ-AE-2/, we use its hard link while setting up PyCharm:
$ readlink -f /home/robertsc/2D-VQ-AE-2/
/gpfs/home5/robertsc/2D-VQ-AE-2/
Connect PyCharm to the allocated node
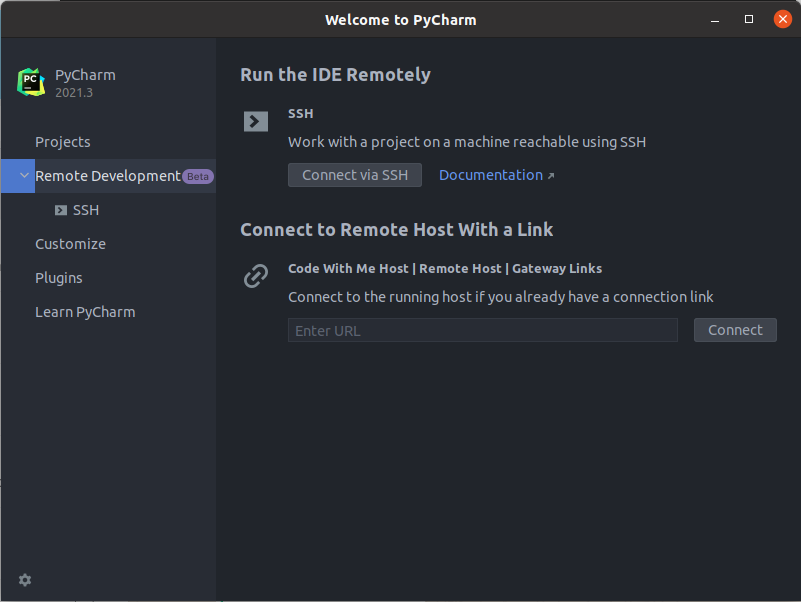
Click "Connect via SSH"
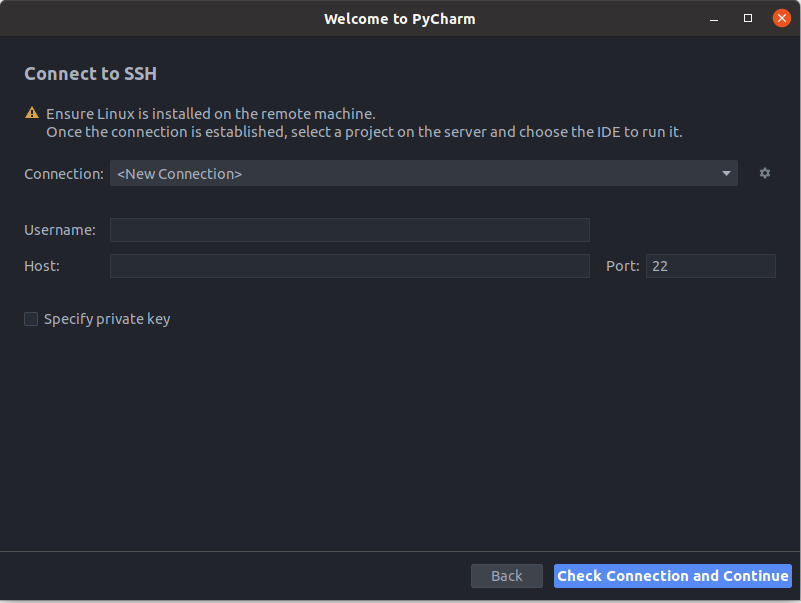
Click the ![]() icon next to the <New Connection> bar,
icon next to the <New Connection> bar,

and then the ![]() button on the next page.
button on the next page.
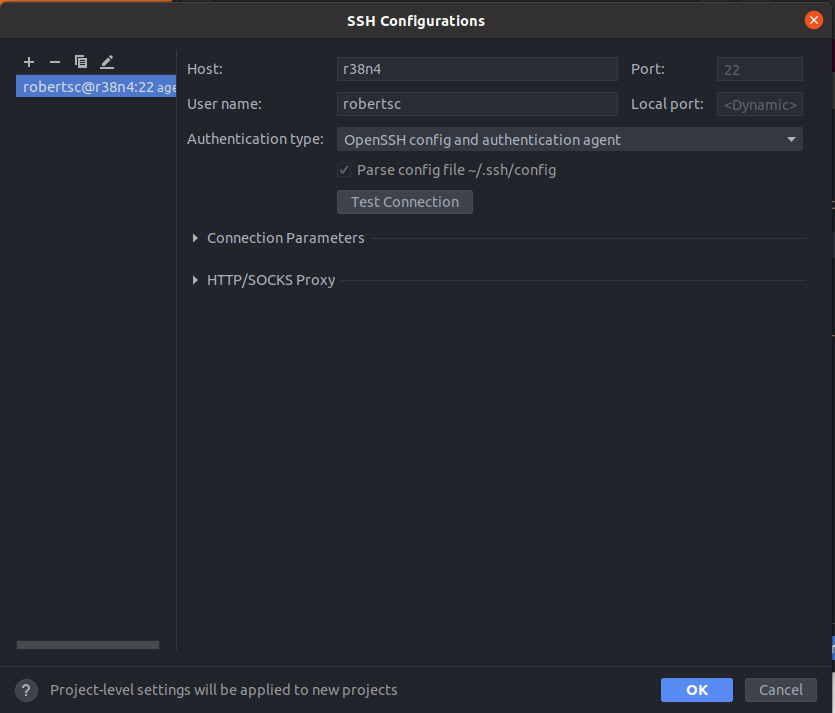
In the SSH configurations screen:
- Enter your username
- fill in the node name as Host
- set "Authentication type" to "OpenSSH config and authentication agent"
- click "OK".
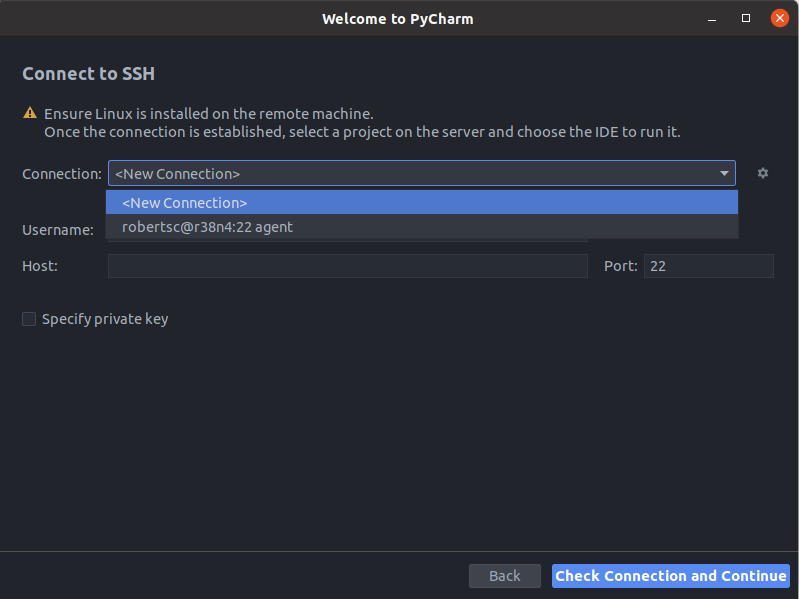
Select the added configuration from the drop-down menu, and then click "Check connection and Continue", after which a connection to the node will be made
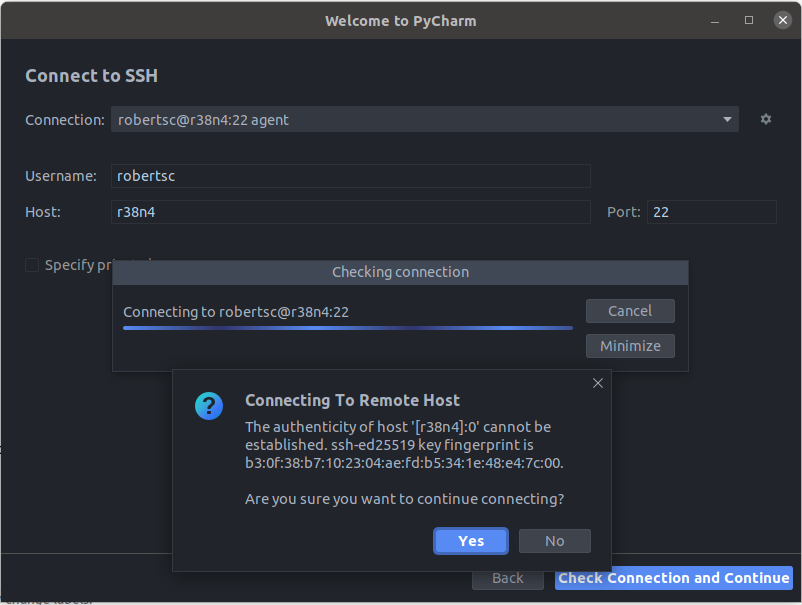
The first time you connect to a specific node, you will be asked if you trust the RSA key. Press "Yes".

You will be asked to fill in your password twice: once to login to Snellius/Lisa, and once to login to the allocated node.
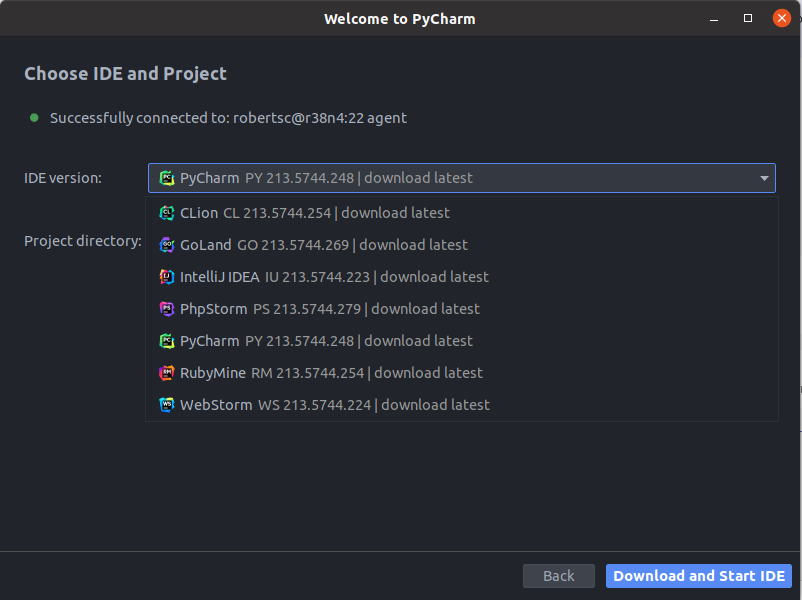
In the drop-down menu, select PyCharm as IDE.

Next, fill in the hard link of your project as "Project directory".
Click "Download and Start IDE".
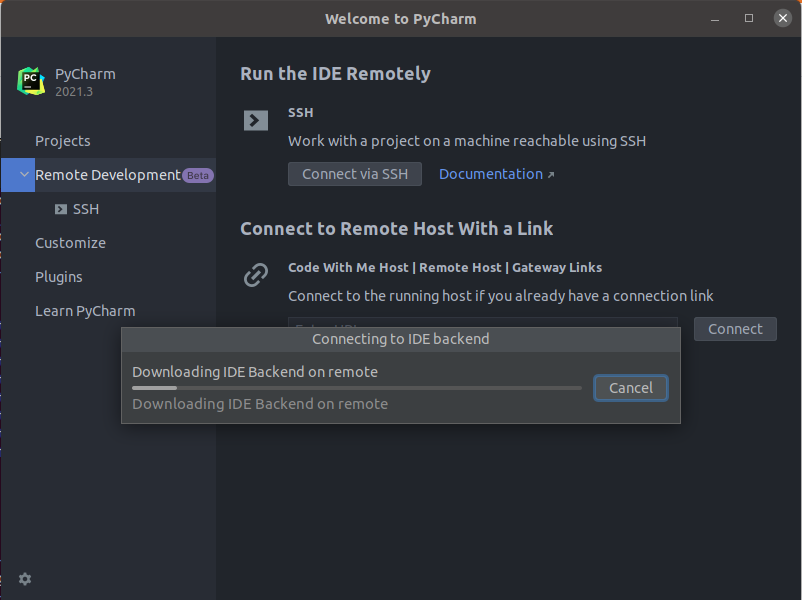
PyCharm will download and launch itself on the interactive node.
If everything went right, we find ourselves in the familiar PyCharm environment:
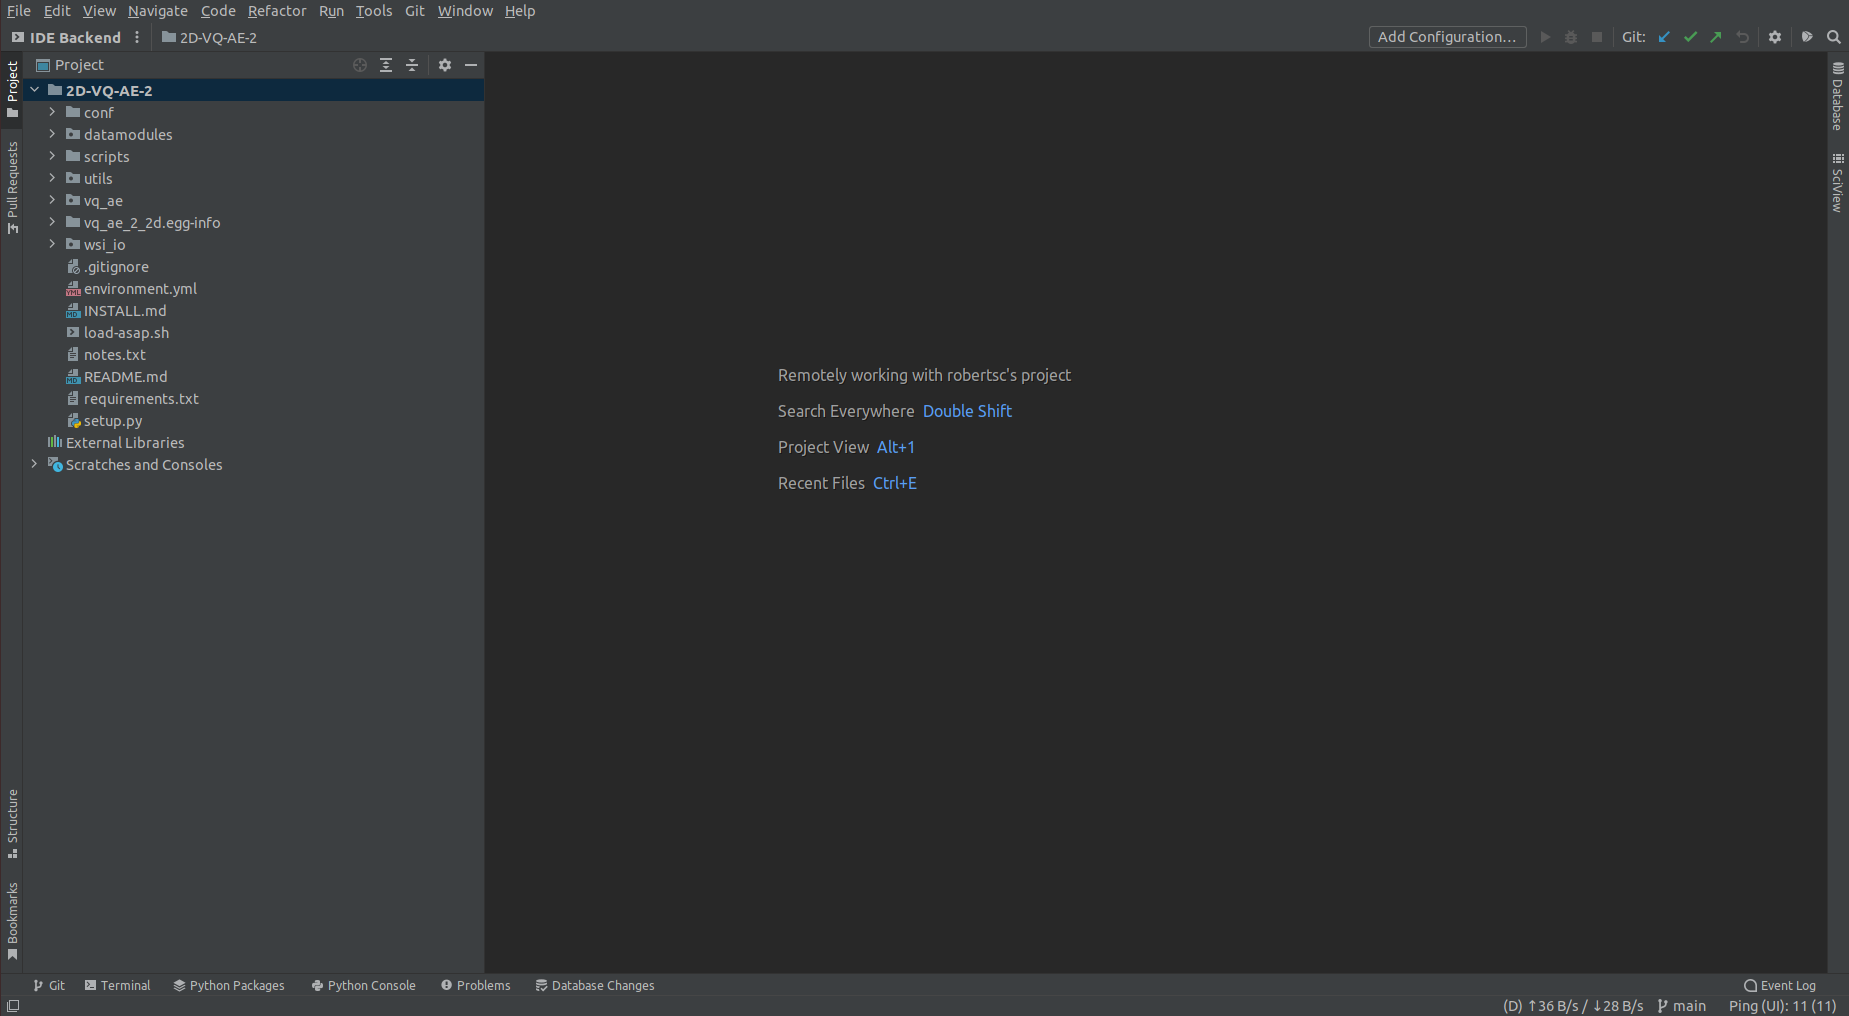
It is worth pointing out that looking in the bottom right of our Development Environment, PyCharm displays the bits/second it is sending and receiving from our node.
As a double check, we can see that PyCharm launched itself on the node if we run the htop command on the interactive node:

Adding a Python interpreter to PyCharm
In general, adding a Python interpreter to your remote PyCharm project works no different than adding one to a local project.
To add a Python interpreter to your PyCharm project, first go to the general PyCharm settings, and then under "Project" go to "Python interpreter".
There, you can select the flavour of environment you're used to.
We will list some ways to add a Python interpreter to your project which may not immediately be intuitive.
Again, the paths shown below should be converted hard links.
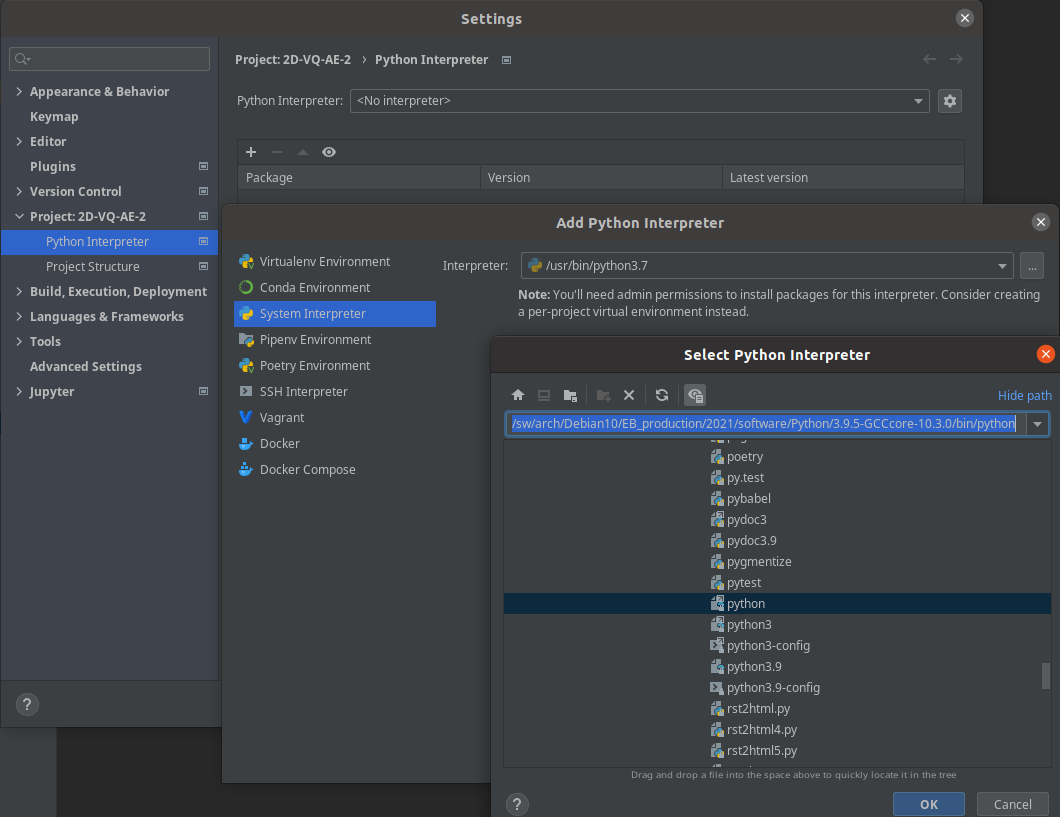
System Python (i.e. from a module)
We need to find the hard link to the Python loaded when we execute module load Python/<xxx>.We can find out its exact location with the which command like so:
$ module load 2021
$ module load Python/3.9.5-GCCcore-10.3.0
$ which python
/sw/arch/Debian10/EB_production/2021/software/Python/3.9.5-GCCcore-10.3.0/bin/python
Then, paste the above path at System Interpreter → triple dots '...' menu → Select Python Interpreter
(Already existing) Conda environment
Again, we can find out where our Python interpreter executed with the which command, after activating your conda environment:
$ module load 2021
$ module load Miniconda3/4.9.2
$ conda activate 2D-VQ-AE-2
$ which python
/home/robertsc/.conda/envs/2D-VQ-AE-2/bin/python

The correct conda executable path should select itself automatically.
Development
You should now be setup to work with your project!
Any time you execute any code, your code will be running on your allocated node.
Good luck!