Introduction
Visual Studio Code is a popular source code editor from Microsoft, with support for many languages, such as C/C++, Fortran and Python. One notable feature is the option to do remote development over SSH. In this setup, the VS code GUI runs locally (e.g. on your laptop), but connects to a remote server (e.g. running on Snellius). Tasks such as editing files and running processes then work transparently on the remote server, including access to a terminal from within VS Code.
Using VS Code remotely on Snellius can be done in two ways:
- Using the Remote - SSH extension, with the VS Code Server running on a login node and the GUI on your local system
- Running VS Code in a VNC remote desktop on a compute node
These two options have different tradeoffs and limitations described below. Instructions for using either of these methods are given in detail in the next sections.
Running the VS Code Server on a login node
Advantages:
- The VS Code GUI can still be used locally as you are used to. The extra step is connecting to the remote server on the login node over SSH, but this is fairly simple to do from the GUI.
Disadvantages:
- There's a limit on the CPU time a user process executing on a login node, after which it will get killed automatically. This limit is also enforced on the VS Code Server process(es) and so it may get killed at an unexpected time.
- You can't do real test runs of your code on the login node directly, as you need to use a compute node for that. The latter involves setting up and submitting a SLURM job as usual, but this is not transparently supported by VS Code and needs manual actions.
- Customizing the environment (e.g. loading modules) in which the VS Code Server runs can be tricky.
Detailed documentation from Microsoft on remote development with this method can be found here.
Running VS Code in a VNC remote desktop
Snellius
Remote visualization through VNC is not fully configured yet on Snellius. This option is, therefore, not currently available.
Advantages:
- You can use the VS Code GUI almost in the same as on your local system. There's no need to use a VS Code Server.
- You can fully utilize the computational power of a compute node for (interactively) testing your code.
Disadvantages:
- You need to use the VNC remote desktop workflow. This isn't complex, but it adds a few steps in setting up.
- You can't directly access files on your local system (e.g. laptop) from within the VS Code GUI, as it runs remotely on a compute node.
Running the VS Code Server on a login node
Here we describe the steps needed to have VS Code run locally on your own system, using a remote connection to the VS Code Server running on Snellius.
Install VS Code locally
- Download VS Code for your local system from https://code.visualstudio.com/#alt-downloads.
- Install VS Code using the downloaded installer.
Install the Remote SSH extension
- Open VS Code on your local system and go to the Extensions tab.

- In the search field type “remote ssh”. Choose the Remote - SSH extension and install it using the little blue Install button.

Connect to the remote host (Snellius)
- Click the green
 icon in the lower left of the VS Code GUI; or press F1 and enter "remote-ssh connect" in the search field, then click Remote - SSH: Connect to Host...
- Enter your username and hostname in the input box that appears, e.g.
<username>@snellius.surf.nland Then press Enter.
- By default, a new VS Code window will open and a connection will be made with Snellius and you will be asked to enter your regular CUA password.

- If this is a new connection a prompt will appear asking you to select the platform of the remote host. In this case it will be invariably Linux. It will take a few seconds to install the new server

- After connecting is successful the lower-left corner will show the remote hostname in green.

The first time the remote connection is made VS Code will install a number of things on the remote server, in the~/.vscode-serverdirectory. - Any directories you navigate to or files you open within VS Code will be those on the remote server, i.e. Snellius. For example, with File > Open File...

Terminal access
VS Code provides terminal access on the remote system from within the GUI. Use the Terminal > New Terminal menu option, or press Ctrl + Shift + ` (Windows/Linux) or ^ + Shift + ` (macOS). Note that the last character of the key combination is a backtick.
A new area will open within the GUI holding the terminal for the remote system where the VS Code Server is running:

Installing additional extensions
For improved editing of source code VS Code provides many extensions. For example the C/C++ Extension Pack. In some cases when loading a file of a new type for the first time VS Code will show a prompt to install the corresponding extension. But to manually install such an extension use the Extensions tab (or View > Extensions), then search for the extension by name and use the little blue Install button. For some extensions a reload of VS Code is needed, which can be done by pressing on the little blue Reload Required button.
VS Code extensions will be installed on the remote server. In general, ~/.vscode-server will hold all files related to the VS Code Server installation.
Below we list some useful settings for some of these extensions.
C/C++ Extension Pack
After opening a folder with C/C++ sources you can set up the correct compiler. Press F1 and type "c++ edit" and pick C/C++: Edit Configurations (UI).
Change the Compiler path to /hpc/eb/compilerwrappers/compilers/gcc.
Python Extensions
Installing Python Extensions
There are various python extensions that can be installed. First, let's open the extension menu. Press F1 and type 'install extensions', and click on it.

You should now see the extensions pane on the left hand side

In the 'Search Extensions in Marketplace' box, type 'Python'. At the very least, you'll probably want the Python extension by Microsoft installed. There is also the Python Extension Pack, which bundles this Python extension and a few others. To install it, simply press the blue 'install' button.

If you remove 'Python' from the search bar, you'll see your currently installed extensions, and you will see that this one was installed on the remote machine:

Making sure VS Code uses the right software environment
There are two scenarios: either you are using packages from the environment modules installed on Snellius, or you are using a python (or conda) virtual environment.
In the first case, things are a bit difficult since unfortunately, VS Code (and the Remote-SSH extension) are not aware of environment modules. The only way to alter the environment is by having the Remote-SSH extension execute a so-called RemoteCommand before it starts the server. This can be done in the SSH Config file. But first, we'll need to adjust two settings in the remote SSH configuration. To do so, connect with the machine using the 'Connect to remote machine' steps described earlier. Once connected, press F1 and type 'Open Remote Settings'. Note that this option is only available if you are currently connected to the remote machine (i.e. if the green connection icon in the bottom left shows you are connected to the remote machine). Then, add the following three lines to that settings file:
    "remote.SSH.useLocalServer": true,
    "remote.SSH.enableRemoteCommand": true,
    "remote.SSH.remotePlatform": "",
Unless you have also altered other remote SSH settings, the file will probably look something like this now:
{
    "remote.autoForwardPortsSource": "output",
    "remote.SSH.useLocalServer": true,
    "remote.SSH.enableRemoteCommand": true,
    "remote.SSH.remotePlatform": "",
}
Now, we can define the RemoteCommand in the SSH Configuration file of the local machine. To do this, type F1, then 'Open SSH Configuration File'. You should get a dropdown of the configuration files, one of which contains the system you added. You can then add the RemoteCommand , after which the configuration file should something like this.
In this is an example where we load the PyTorch/1.11.0-foss-2021a-CUDA-11.3.1 module (outdated, mind you).
Host snellius.surf.nl
  HostName snellius.surf.nl
  User <your_snellius_login>
  RemoteCommand source /etc/profile; module load 2021; module load PyTorch/1.11.0-foss-2021a-CUDA-11.3.1; bash
Now, close your connection to the remote machine (press F1 and type 'Close remote connection'). Then, reconnect. Now, the environment should be altered. You can easily check this: in the VS code terminal, if you type module list , you should now see the PyTorch module as being loaded. More importantly, the VS Code python extension can now search the PYTHONPATH that is set by this module for python modules. In our example with PyTorch, it will recognize an import torch as a valid import, and subsequently can autocomplete when you type e.g. torch. .
If for some reason, you cannot get the environment correct using the RemoteCommand option, the alternative is to modify your ~/.bashrc on Snellius to include the module load statements for the modules you'd like to have loaded. We generally strongly discourage loading modules in your .bashrc as it changes the environment of any login you do to the system.
For the second case, i.e. when you use virtual environments, things are simpler. You can simply select the Python interpreter from your virtual environment, and VS Code will find all Python modules installed in that environment. To select a Python interpreter, press F1, then type 'Select interpreter'. This should show a dropdown list of all python executables VS Code manages to find in 'standard' places: by default, it will look in paths like .conda and .virtualenvs in your homedir, and scan the PATH for python interpreters. If you have a python virtual environment installed in a non-standard location, you'll have to make sure that the Python extension knows where to find your virtual environment. Click 'File' => 'Preferences' => 'Settings' and search for 'venv'. In the 'Python: Venv Path' setting, you can point to the paths where your virtual environments are installed.
Running VS Code in a VNC remote desktop
Note that the general setup instructions and workflow for using a remote desktop on Snellius are described here. In this section we only describe the specific steps needed to get VS Code working in such a remote desktop.
Installing VS Code on Snellius
We cannot provide VS Code as a software module on Snellius, as it uses a personalized license. SURF cannot legally install such software.
These are the (one-time) steps needed to install VS Code in your home directory on Snellius:
- Go to the VS Code download page at https://code.visualstudio.com/Download
- Below the Linux Penguin icon click the blue
64 bitlink in the.tar.gzline and save the resulting filecode-stable-x64-......tar.gzon your local system. Then transfer it to your home dir on Snellius. - Extract the file somewhere in your home dir. You should end up with a directory called
VSCode-linux-x64
Running VS Code in the VNC remote desktop
- Start a remote desktop job using the
remotevismodule andvnc_desktopcommand. Again, see the general remote desktop documentation mentioned above for more detail. - Within the remote desktop open a terminal window
- In the terminal window run:
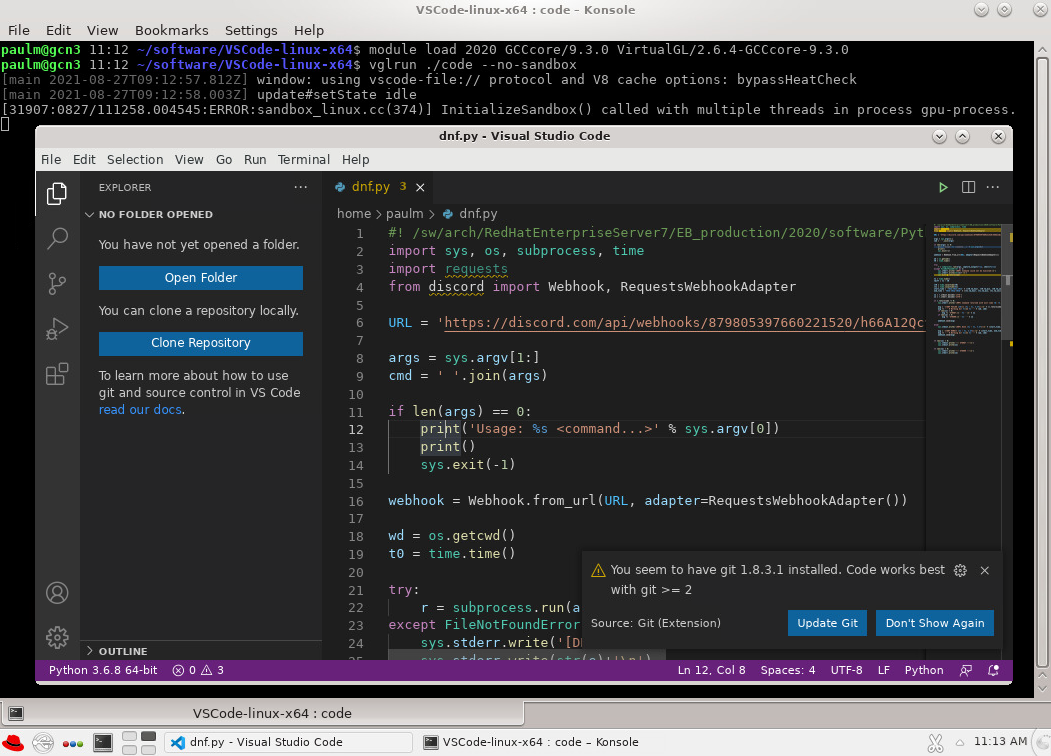
# Load the necessary modules to make VS Code work correctly
# If you need to load any more modules to be available it is best to do that here as well.
$ module load 2020 GCCcore/9.3.0 VirtualGL/2.6.4-GCCcore-9.3.0

# Navigate to the directory where you installed VS Code
$ cd ~/VSCode-linux-x64

# Start the VS Code GUI
# The vglrun prefix is needed for correct OpenGL functionality.
# The --no-sandbox is needed as the sandbox needs root rights to work, which you don't have as a regular user.
~/VSCode-linux-x64$ vglrun ./code --no-sandbox
At this point, the VS Code GUI will be running within the remote desktop window and can be used as normal.
When you are done working with the remote desktop don't forget to cancel the corresponding SLURM job
Connection Timing Out (what to do)
If you have an older version of Remote-SSH or VS Code, or connect to a system that you haven't connected in a while, you could run into timeout issues.
The reason is that the newer versions require a specific server for each remote host. This is explained in "Connect to Remote Host" point 4.
The solution for that is quite simple:
- F1 → Remote-SSH: New Connection
- Follow the steps for establishing a new connection (enter user@remote or the entry in your .ssh/config if you have that)
- Select Linux from the list
- That's all
In other instances you may want to increase the timeout, this can be done in this way:
- F1 → Remote-SSH : Settings
- Scroll down to "RemoteSSH use Local Server and uncheck the checkbox
- Scroll up to "Connection Timeout" and set it to 30 (not needed but good to have)